This section will cover the entire set-up process, as far as the WooCommerce ‘Settings’ are concerned. There are many different sections within the Settings page, which will make this entry especially large, so bare with us. 😉
These ‘Settings’ should be configured as the very first step upon installing WooCommerce.
To configure your shop go to WooCommerce > Settings. Then review the content below to get more information on each of the WooCommerce Options.
General Settings
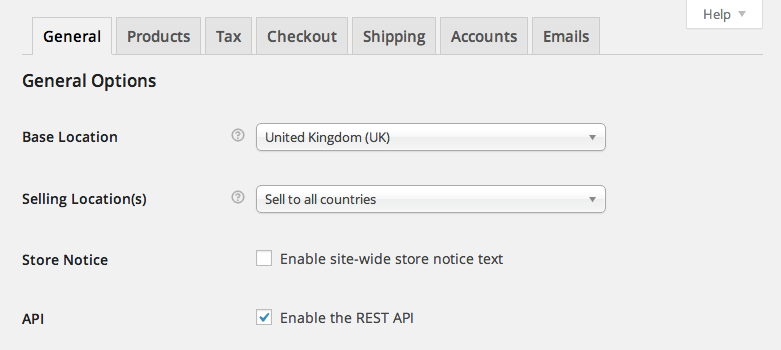
General Options
Base Location
This defines your shops base country (i.e. the country you are based in as a seller). It determines default tax rates and customer locations.
Selling Location
Select if you would like to sell to all countries or to specific countries.
Store Notice
Enable site-wide store notice text by selecting the checkbox then editing your message below. This message will show up across the top of your site and can be stylized by adding the following class to your custom CSS (for example):
p.demo_store {background: white;}
API
Chose to enable the REST API. This API is mainly aimed at developers and is used to access your store data from outside of WordPress, for example from an external app.
Currency Options
The following options affect how prices are displayed on the front-end.
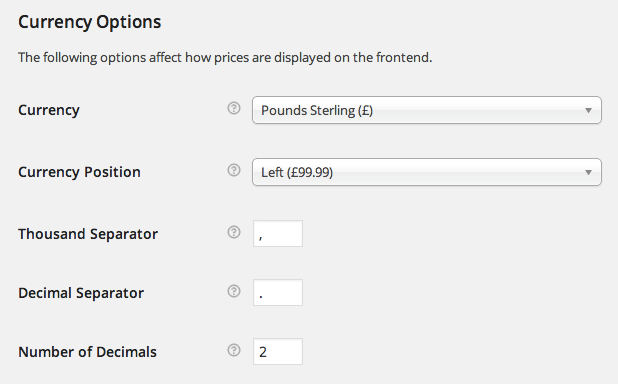
Currency
Choose the default currency of the store. Only one default currency may be selected.
Currency Position
Chose the default currency position for your prices: Left, Right, Left/Right with space
Thousand Separator
Chose the symbol to use for the thousand separator: ex. 1,000
Decimal Separator
Chose the symbol to use for the decimal separator: ex. 100.00
Number of Decimals
Chose how many numbers to display to the right of the decimal when displaying prices. ex. 2 = 100.00
Styles and Scripts
Chose hex colors for the following front-end styles: Primary, Secondary, Highlight, Content, Subtext.
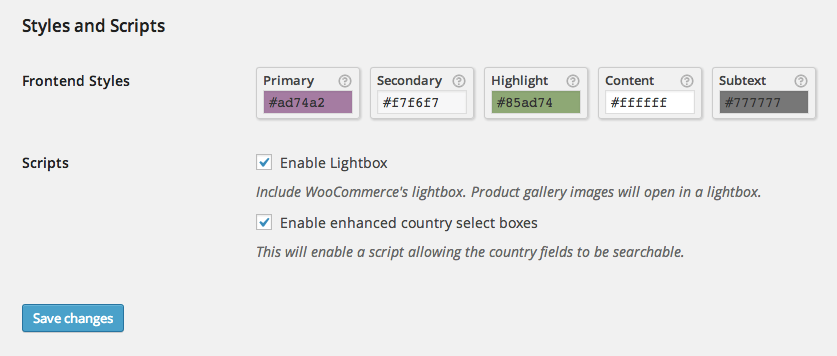
Scripts
Options include:
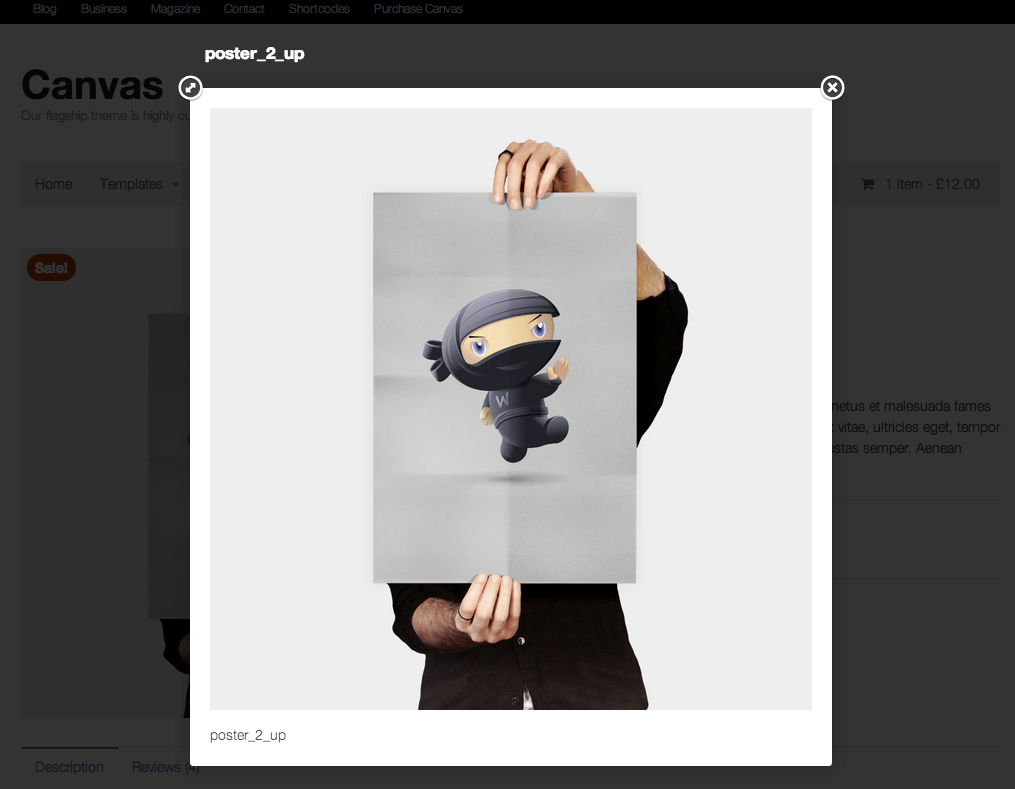
- Enable Lightbox – Product gallery images will open in a lightbox, which is a pop up window in the browser.
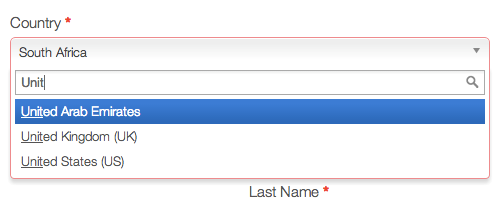
- Enable enhanced country select boxes – This will enable a script allowing the country fields to be searchable. The country fields can be found when your customer goes to checkout.
This is an example of a lightbox:
Products
Here you will find the settings for your products and product pages, including product image sizes, and downloadable product settings.
Product Listings
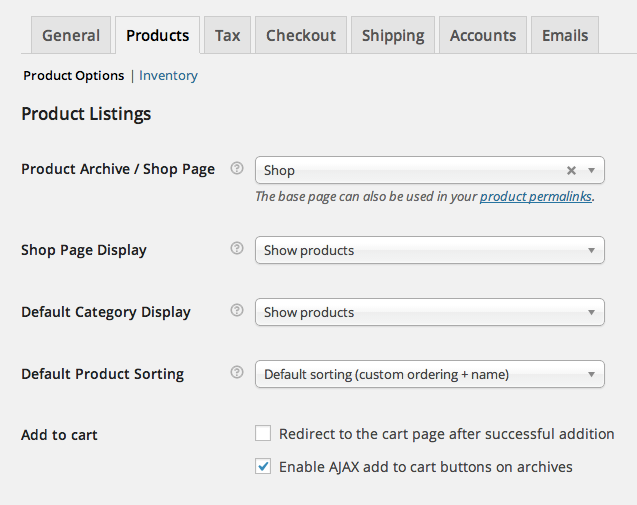
Product Archive / Shop Page
Select what page you would like to be the default shop page.
Shop Page Display
Select to show products, subcategories or both.
Default Category Display
Select to show products, subcategories or both.
Default Product Sorting
Select the default product sorting, options include:
- Default product sorting (custom ordering + name)
- Popularity (sales)
- Average rating
- Sort by most recent
- Sort by price (asc/dec)
Add to cart
Options include:
- Redirect to the cart page after successful addition – this will automatically take your customer to the cart page upon adding a product.
- Enable AJAX add to cart buttons on archives – this will add the ‘Add to Cart’ option to your shop archive pages.
Product Data
Select the weight and dimensions units for your products.
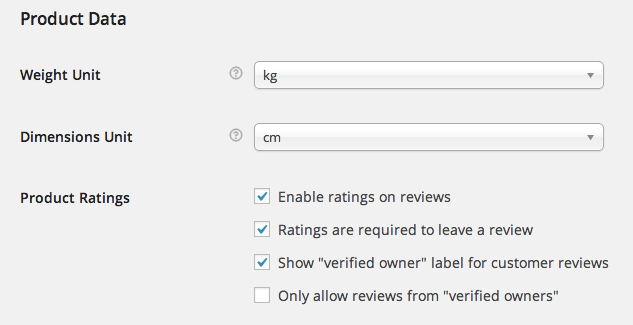
Product Ratings
Options include:
- Enable ratings on reviews.
- Ratings are required to leave a review.
- Show “verified owner” label for customer reviews. If a customer is logged in with their account and have purchased this product on their account they will be labeled as a ‘verified owner’.
- Only allow reviews from “verified owners”. Only customers that are logged in with the account they used to purchase the product can leave a product review.
Product Image Sizes
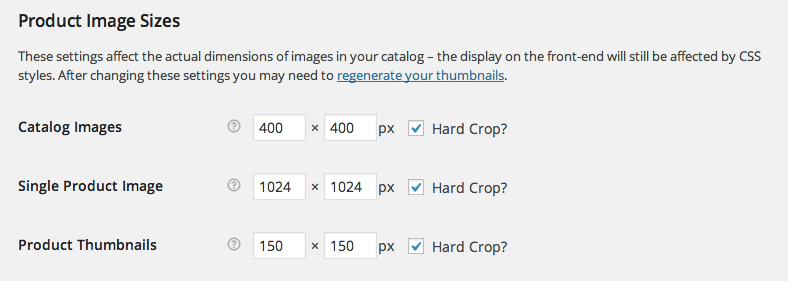
These settings effect the actual dimensions of images saved in your catalog once you upload an image – the display on the front-end will be overridden by CSS styles if applied. If you were to change these settings you would need to regenerate your thumbnails if you had previously uploaded images, in order for the new image size settings to be applied.
Image size options include:
- Catalog Images
- Single Product Image
- Product Thumbnails
Downloadable Products
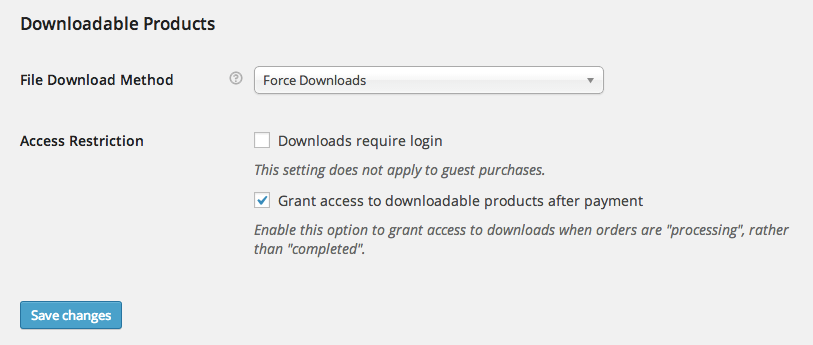
File Download Method
This option controls how your store will serve downloadable files to purchasers. Options include:
- Force Downloads – Files are ‘forced’ to download via a PHP script. The files shouldn’t be accessible to anyone but purchasers and direct links are hidden.
- X-Accel-Redirect/X-Sendfile – This is similar to ‘forced’ above, however it has much better performance and can support larger files. This option requires that your hosting provider supports either X-Sendfile or X-Accel-Redirect so you will need to check with them first.
- Redirect only – Download links simply link the user to the file. Files are not protected from outside access.
Most stores will want to use one of the top 2 methods as these keep your files safe from outside access. Redirect should only be used if you encounter problems or don’t mind downloads being insecure.
Access Restriction
Options include:
- Select if downloads require login – This setting does not apply to guest purchases.
- Grant access to downloadable products after payment – Enable this option to grant access to downloads when orders are “processing”, rather than “completed”.
Inventory Options
To edit your shop’s inventory options go to: WooCommerce > Settings > Product > Inventory.
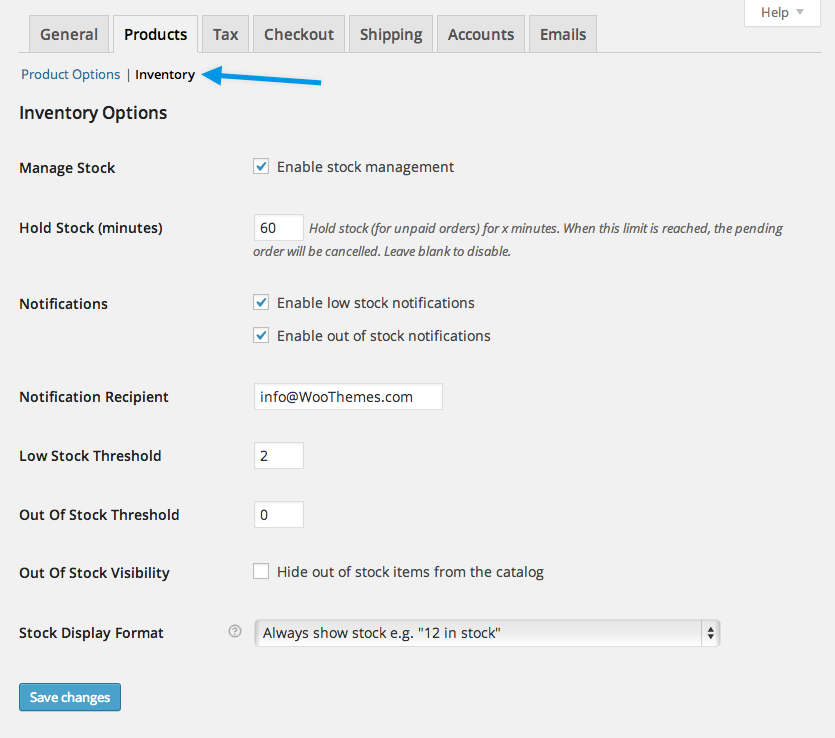
Here you can chose whether you want to enable stock management or not. If selected you have the following options available:
- Hold Stock (minutes) – Hold stock (for unpaid orders) for x minutes. When this limit is reached, the pending order will be cancelled. Leave blank to disable.
- Enable low stock notifications
- Enable out of stock notifications
- Notification Recipient – set the email for low and out of stock notifications.
- Low Stock Threshold – set the number of products to trigger the low stock notification.
- Out Of Stock Threshold – set the number of products to trigger out of stock status.
- Out Of Stock Visibility – Chose to hide out of stock items from the catalog.
- Stock Display Format – Options include:
- Always show stock – eg. “12 in stock”
- Only show stock when low – eg. “Only 2 left in stock” vs. “In stock”
- Never show stock amount
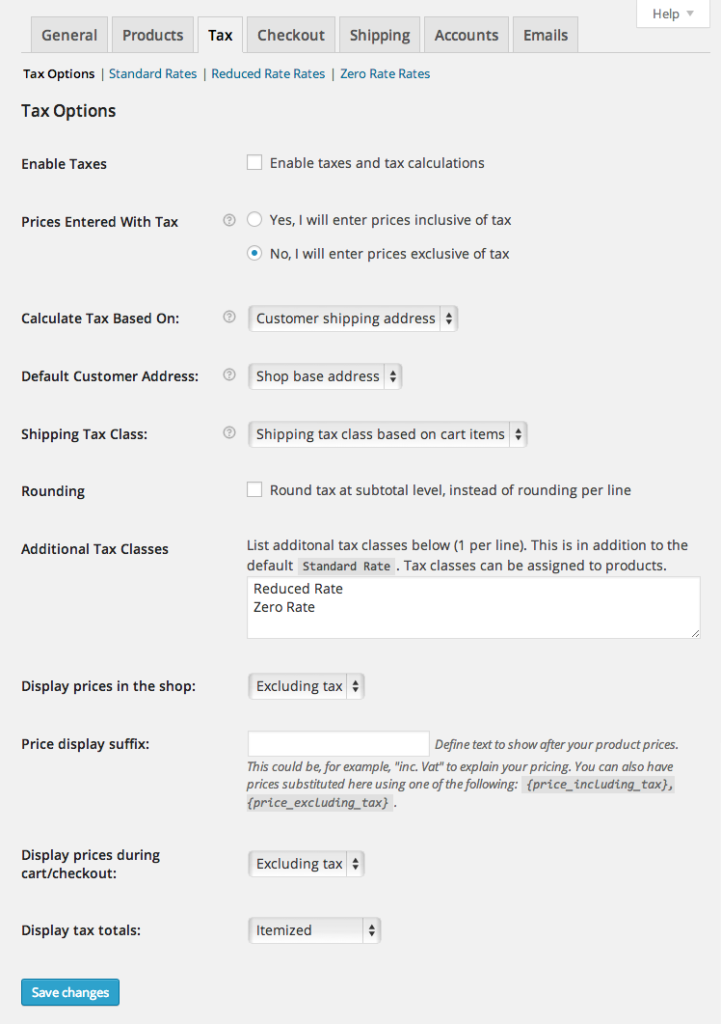
Tax
Checkout
Here you can control settings for your checkout pages/process as well as your payment settings.
Checkout Process
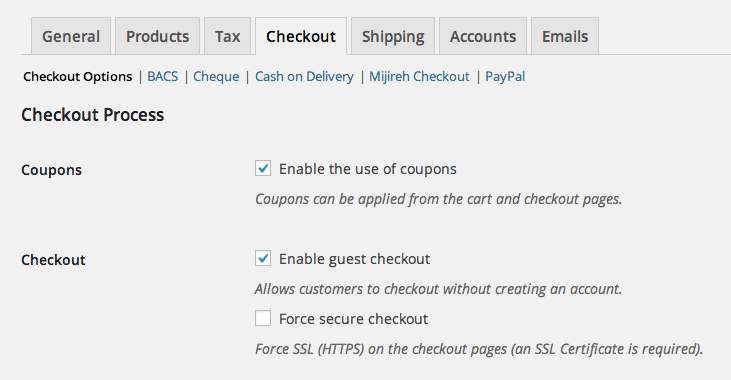
Coupons
Select to enable the use of coupons – Coupons can be applied from the cart and checkout pages.
Checkout
Options include:
- Enable guest checkout – Allows customers to checkout without creating an account.
- Force secure checkout – Force SSL (HTTPS) on the checkout pages (an SSL Certificate is required).
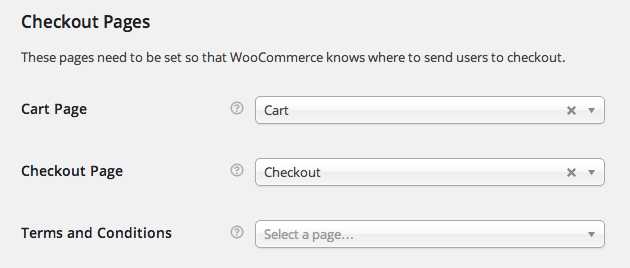
Checkout Pages
These pages need to be set so that WooCommerce knows where to send users to checkout: Cart Page, Checkout Page, Terms and Conditions
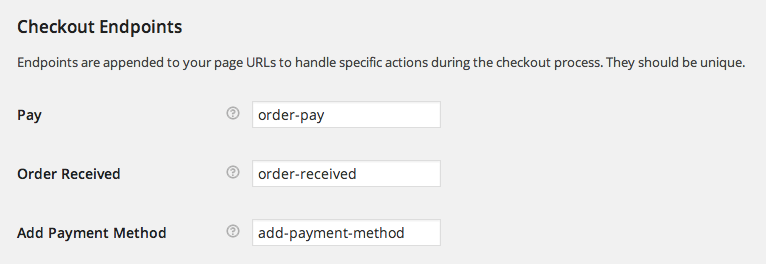
Checkout Endpoints
Endpoints are appended to your page URLs to handle specific actions during the checkout process. They should be unique.
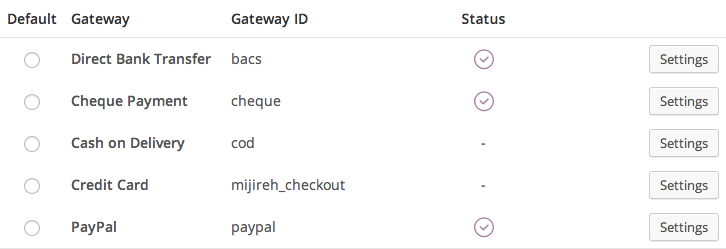
Payment Gateways
Installed gateways are listed here. You can drag and drop the gateways to control the order they display in on the front-end.
Shipping
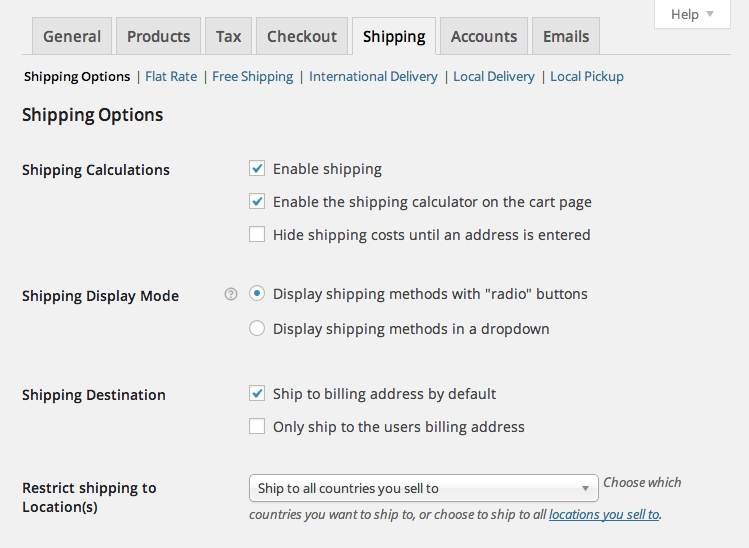
Shipping Options
Shipping Calculations
- Enable shipping
- Enable the shipping calculator on the cart page
- Hide shipping costs until an address is entered
Shipping Display Mode
Display shipping methods with “radio” buttons or in a dropdown.
Shipping Destination
Ship to billing address by default or only ship to the users billing address.
Restrict shipping to Location(s)
Ship to all countries you sell to to specify certain countries you will not ship to.
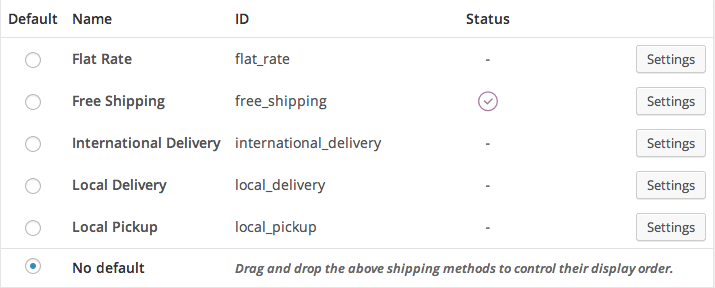
Shipping Methods
Here you can chose which shipping option is default or enabled and you can drag and drop to reorder these in whatever order you prefer.
Accounts
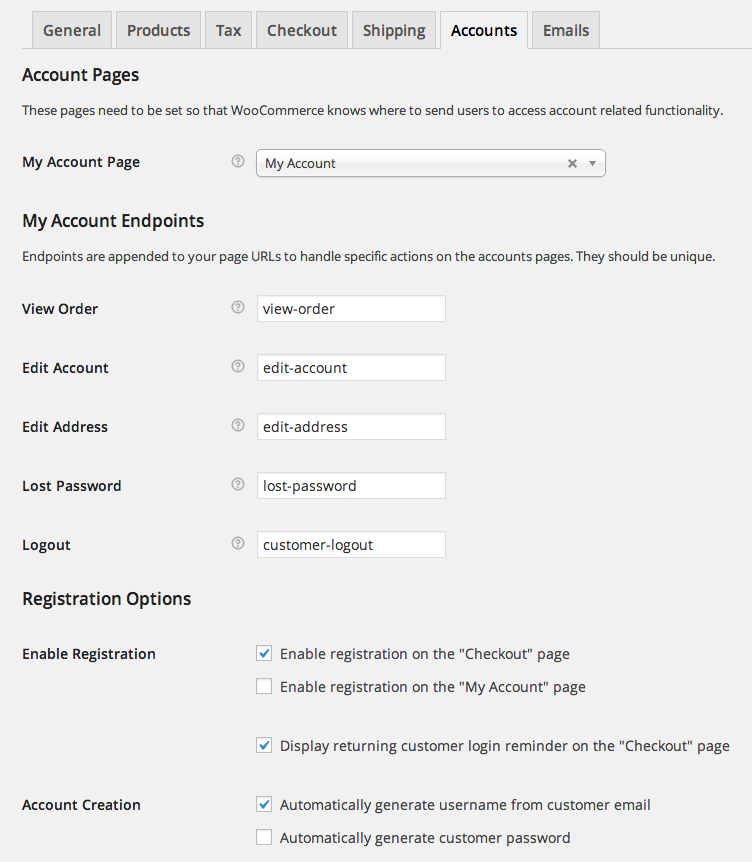
Account Pages
These pages need to be set so that WooCommerce knows where to send users to access account related functionality.
My Account Page
Select the page from the dropdown that you want to use for the My Account page.
My Account Endpoints
Endpoints are appended to your page URLs to handle specific actions on the accounts pages. They should be unique. Options include:
- View Order
- Edit Account
- Edit Address
- Lost Password
- Logout
Registration Options
Enable Registration
- Enable registration on the “Checkout” page
- Enable registration on the “My Account” page
- Display returning customer login reminder on the “Checkout” page
Account Creation
Options include:
- Automatically generate username from customer email
- Automatically generate customer password
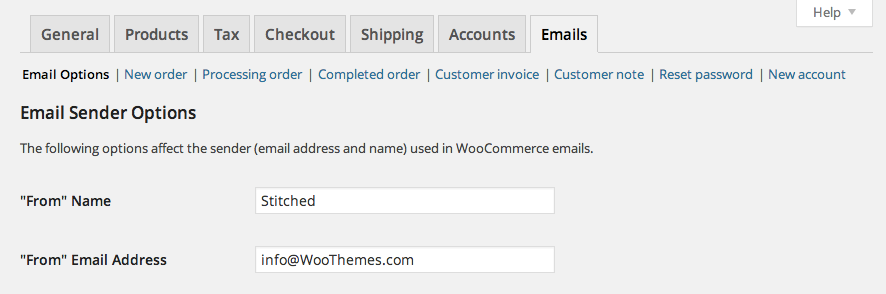
Emails
Here you can find the email settings and templates to edit.
Email Sender Options
Set the ‘From’ name and email for the sender used in WooCommerce emails.
Email Templates
This section lets you customize the WooCommerce emails.
It is best if you keep this customization in a child theme so your changes are not overwritten when you update your theme.
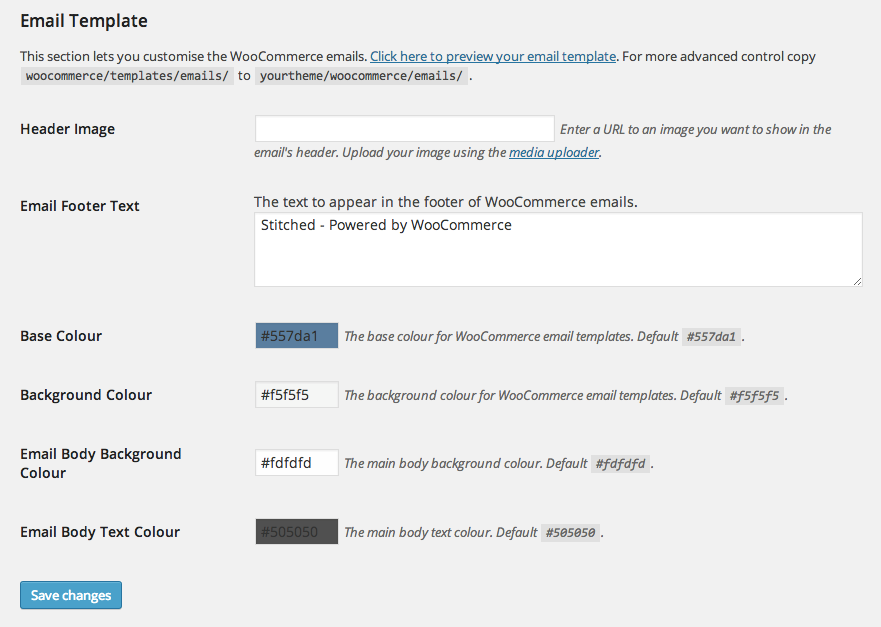
Header Image
Enter a URL to an image you want to show in the email’s header. You can upload your image using the media uploader.
Email Footer Text
The text to appear in the footer of WooCommerce emails.
- Base Color – The base color for WooCommerce email templates.
- Background Color – The background color for WooCommerce email templates.
- Email Body Background Color – The main body background color.
- Email Body Text Color – The main body text color.
Editing Individual Email Templates
Just beneath the Email tab you will see options for the following email templates:
New order | Processing order | Completed order | Customer invoice | Customer note |
Reset password | New account
Each email template will have the following options that you can edit:
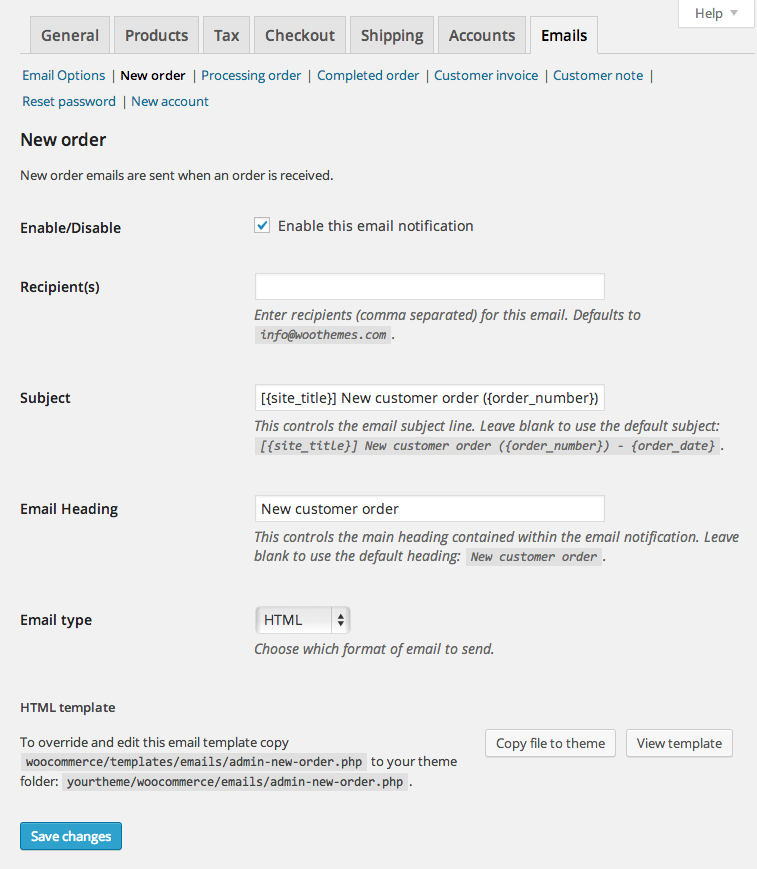
Enable/Disable
Enable this email notification.
Recipient(s)
Enter recipients (comma separated) for this email. Defaults to info@woothemes.com.
Subject
This controls the email subject line. Leave blank to use the default subject:
[{site_title}] New customer order ({order_number}) - {order_date}
Email Heading
This controls the main heading contained within the email notification. Leave blank to use the default heading.
Email type
Choose which format of email to send. Options include:
- Plain Text
- HTML
- Multipart
*This section, along with most all of our WooCommerce based entries, is based on the WooCodex, found at http://docs.woothemes.com.