As you likely know by now, your WordPress blog-based website has many ways to publish content within, such as pages, posts and comments. Pages and Posts are very similar in their methods to publish. In many cases, they can even be displayed almost identically at your WordPress. The main difference between the two is that Pages are by design static while Posts can be static by are by design typically dynamic. In brief this simply means that pages are usually used to present long standing information so once you publish a page it will remain visible to the viewers until you remove them. Posts on the other hand are most commonly used to present time sensitive or even frequently changing information and typically in chronological order. If the administrator of a WordPress site chooses a number of posts to display in a specific location, for instance five, the standard practice is for WordPress to display the five most recent posts in the designated category or with the specified tags. (I will explain categories and tags in greater detail at a later date.)
Steps to Adding New Pages
- Log in to your WordPress Dashboard. If you don’t already know how to do this, please read the page on how to log in to your admin panel, directly before this one. =)
- To go to the Pages main menu, click on the word ‘Pages’ in the left sidebar of your Dashboard. Your sidebar items may or may not be expanded to show their sub items. You will not need to expand them this time but, if you are simply curious, you may click the down-pointing triangle to the right of each title.
You will find Pages below Links in the sidebar. Once you click on “Pages”, you will see the below example: (note: clicking “Add New” will take you right to a blank edit screen, and skip the list of existing pages)
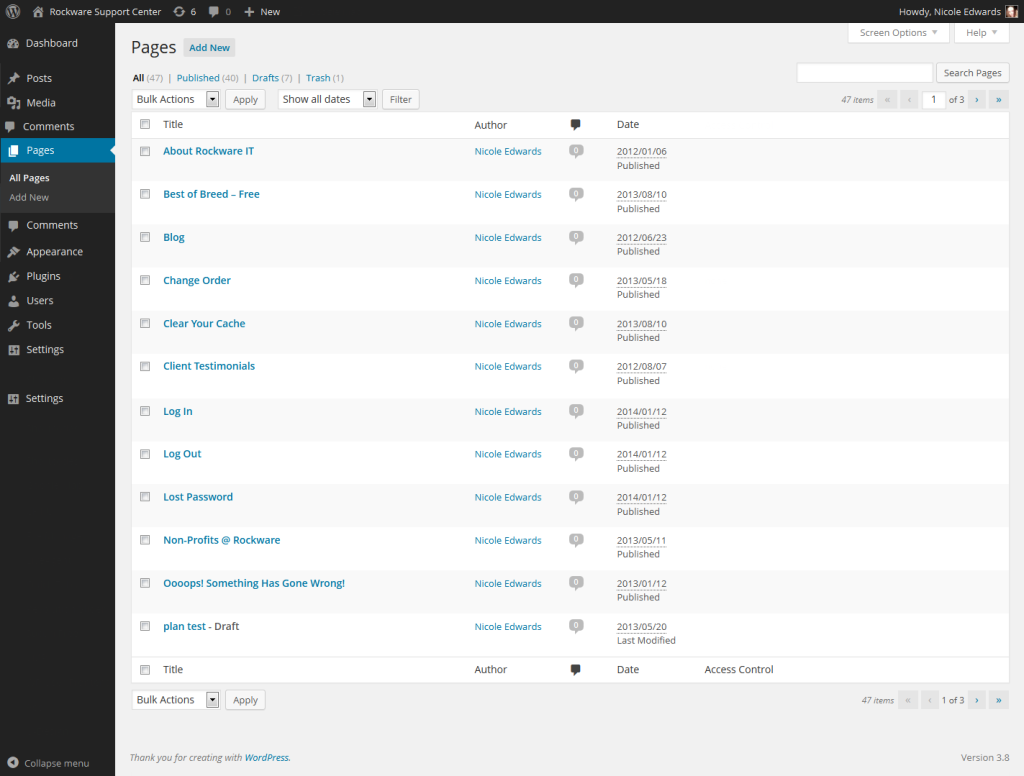
You will see a list of any existing pages, as seen in this example taken from my client’s dashboard If you haven’t already, click on “Add New”, either below Pages on the left hand side, or next to Pages on the Pages page itself. This will bring you to the edit screen:
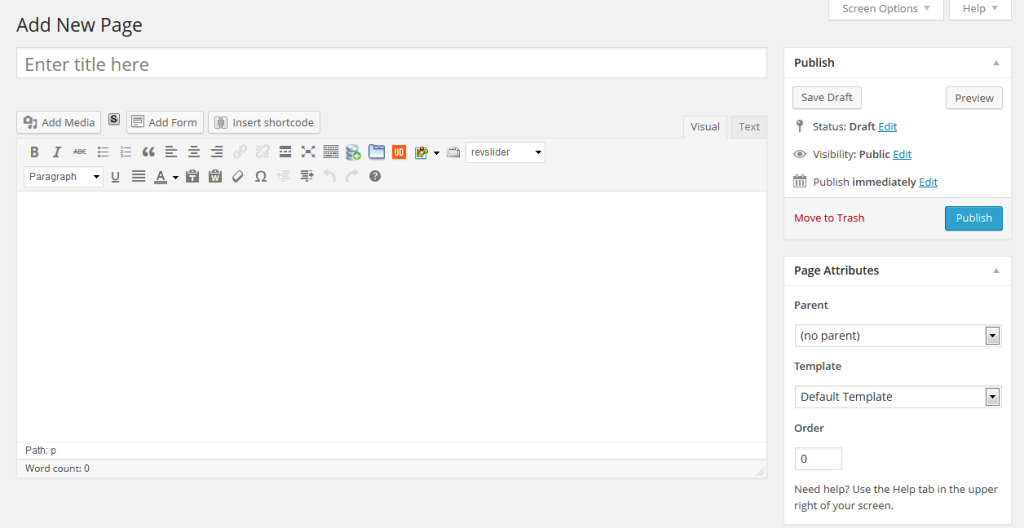
In the top blank white box, give your new page a title. In most cases it helps to be concise because this title will be how your page is listed in the navigation menu of your site. If possible, try to keep it to 3 or 4 short words.
- Create the content of your new page. The next blank white box below the title is where the content goes. If you have ever used email or word processing software, you will see some very familiar buttons at the top of it, including text formatting like bold, italic and strike-through, font color, underline, text alignment left, center and right and pre-formatted options in the drop-down menu titled “Format”. In the format submenu, you can designate the way WordPress should stylize a block of text you have highlighted. For example, Paragraph (or normal formatting), Address (generally italic) and Header (generally larger and bolder than Paragraph).
- Editing Modes. There are two modes in which to edit your content in WordPress: using the Visual mode tab or the Text (HTML) mode tab, both at the upper right of the content box. In most cases you will use the default Visual mode as it presents in a “what you see is what you get” method. In the event that you need to do more advanced editing to the end product using HTML, you can use the HTML mode tab which will show all the coding markup while you edit. If you are unfamiliar with HTML, it is unlikely you will need to use this. Your WordPress page can contain much more than just simple text.
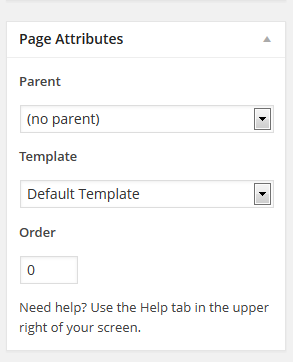
- Choose where your new page will appear in the navigation menu. This is accomplished in the right sidebar under Attributes (see below screen shot). If your new page is going to be a top level item on the menu bar, you can leave the default Parent selection of “Main Page (no parent)”. However, if you would like your new page to show as a sub-menu item under a parent, then choose the menu item you would like to be its parent. Next, if your WordPress theme has multiple templates for page layouts, pick the one that fits the way you want your new page to be displayed in the Template drop-down menu. Lastly, under Order is a box with a zero in it by default. If you replace this with a number, it will designate which order position your new page will appear in either the Main Menu or Sub-Menu, depending on whether you chose a parent and if there are other items in it’s same menu location.
This is found in your New Page dialog’s right sidebar
- Choose whether you will allow Comments and Pingbacks. Allowing comments will mean that readers, most likely with a required approval from you depending on how you have your site configured, can leave their responses to your comments. When approved, these comments are displayed below the comment in a discussion thread with information about the commenter. In my opinion, allowing comments makes any page subject to become a discussion and therefore it would potentially have a “bloggy” feel. If your content is informational by nature and doesn’t really need the input of the public, you might choose to uncheck the “Allow Comments” option. Pingbacks are a method to notify you when somebody on another website provides a link to your page you are creating. By allowing this, you will be notified when somebody references your content and you can therefore investigate whether you approve the usage of your content and how it is presented. I have not seen a way that pingbacks visually effect the presentation of my original content, so I generally leave this option on.
- Publish or Preview the page. Your required information is now complete. If you click on Preview in the upper right corner of the New Page dialog, you will see a preview of how the page will look to the public. This is an option if you want to avoid prematurely allowing anybody to reach your content. If you click on Publish, your new page will then appear where you chose to place it once you revisit your site. (Note: if you do not see the new page, click on your browser’s refresh button to make sure it is loading the latest content.)
NOTE: Follow these same exact steps for creating a new post, with a few exceptions:
- Obviously, in the left hand menu, instead of choosing “Pages”, or the “Add New” underneath “Pages”, you’ll choose “Posts” or the “Add New” under “Posts” in the left hand sidebar menu.
- When previewing the post, it will take you to the single page for that post – however, when you publish a post, it will automatically render in the blog portion of your website, so check there too to see the new edition.